
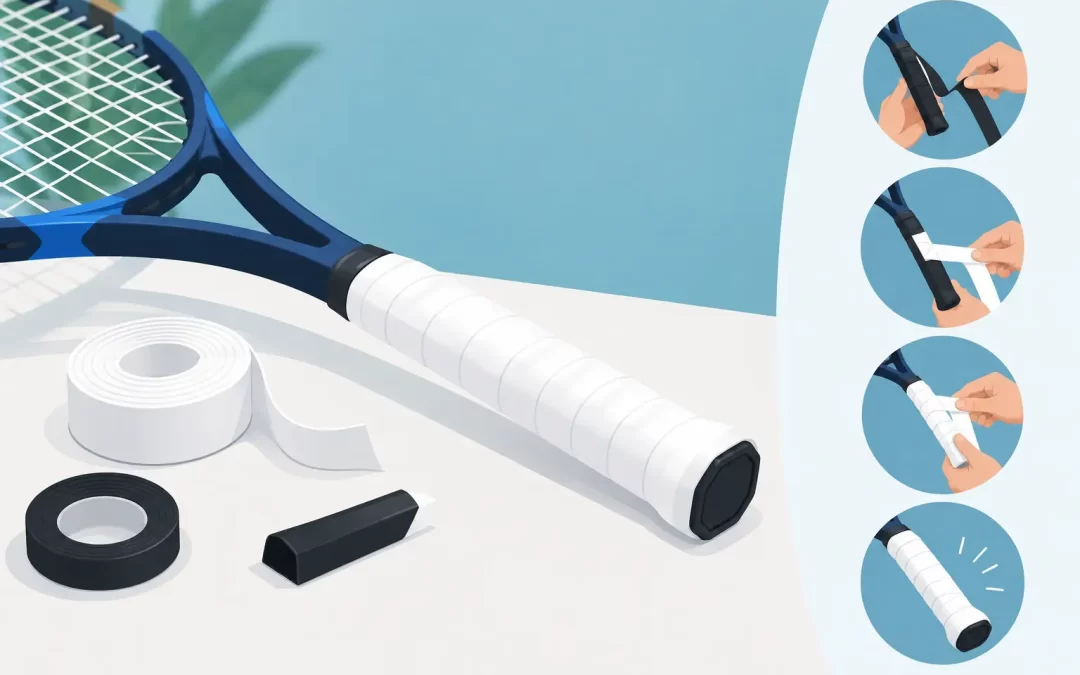
A grip that twists in your hand, bunches at the bevels, or leaves a sharp ridge under your palm can disrupt every ball you hit. Learning how to install tennis replacement grip correctly gives your racquet a more secure, connected feel and lets you tune handle comfort without changing frames.
A replacement grip is the foundational layer on the handle. Unlike an overgrip, which sits on top and is changed frequently, a replacement grip sets the handle’s base shape, cushioning, and overall circumference. Get this layer right and your racquet will feel more stable on serves, cleaner through contact, and less demanding on your hand during long sessions.
Replacement Grip vs. Overgrip
Players often use the terms interchangeably, but they do different jobs. A replacement grip wraps directly around the bare handle or pallet. It has an adhesive backing, usually includes a finishing tape, and is built to last longer than an overgrip. It is your chance to restore a worn factory grip or change the racquet’s feedback.
An overgrip goes over the replacement grip. It adds tack, absorbency, and a small amount of thickness, but it cannot fully fix a compressed or damaged base layer. If you can feel hard edges, gaps, or a grip that has become slick and flat, start with a new replacement grip.
Material matters. Synthetic grips generally offer a dependable blend of durability, tack, and cushioning. They suit most recreational and competitive players. Leather grips provide sharper bevel definition and direct racquet feedback, which appeals to players who value precision and use an overgrip for moisture control. Foam-backed or heavily cushioned grips can reduce vibration and soften the handle, although too much cushioning may make a handle feel less defined on quick grip changes.
What You Need Before You Start
The job is simple, but clean preparation determines whether the result looks professional or feels uneven. Gather a replacement grip, scissors, the finishing tape supplied with the grip, and a small amount of electrical tape if you want to secure the starting end. Keep a clean towel nearby for adhesive residue.
Before removing anything, look at the direction of the existing wrap. Right-handed players typically wrap so the overlap supports the grip as the hand rotates through the forehand. Left-handed players should reverse that orientation. Most replacement grips are tapered, and the narrow end begins at the butt cap.
If you are unsure, hold the racquet in your normal forehand grip and look at the overlapping edge. You want that edge facing away from the direction your hand naturally rubs as you swing. A correctly oriented wrap is less likely to lift or roll during play.
How to Install Tennis Replacement Grip Step by Step
Remove the old grip and clean the pallet
Peel away the finishing tape and unwrap the old grip from the top down. If the original grip is stapled to the butt cap, carefully pull the staple with pliers or leave it in place if it is flat and secure. Do not dig into the pallet with a blade. A damaged pallet can create a permanent pressure point under every new grip.
Wipe away loose adhesive, sweat residue, and bits of old backing. The handle does not need to be perfectly bare, but it should be dry and smooth. If the pallet has a crack or a loose butt cap, address that before wrapping. A fresh grip cannot solve a structural handle problem.
Anchor the tapered end at the butt cap
Remove only a few inches of the adhesive backing at first. Set the tapered end along one bevel at the base of the handle, with enough material extending past the butt cap to fold neatly around it. This first wrap is your anchor, so take a moment to make it straight.
Wrap around the butt cap once with firm, controlled tension. Pull hard enough to eliminate slack, but not so hard that you stretch a soft grip thin or distort its cushioning. Players commonly make the mistake of yanking the grip tight at the bottom, then losing tension as they move upward. Consistent pressure is better than maximum pressure.
Follow the bevels with even overlap
Continue up the handle in a spiral. Let each pass overlap the previous one by roughly one-eighth inch. The exact overlap depends on the grip’s width and the handle length, but keep it consistent from bottom to top. Uneven overlap creates a handle that changes thickness unexpectedly, often right where a player needs to shift grips for a serve or backhand.
Use the racquet’s bevels as your guide instead of staring only at the edge of the grip. If the grip starts drifting, unwrap a turn or two and correct it immediately. Trying to force a crooked wrap straight later usually produces wrinkles.
As you pass the middle of the handle, check the feel with your fingers. You should still be able to identify the bevels clearly unless you intentionally selected a highly cushioned grip. Defined bevels help players locate Continental, Eastern, and semi-western positions without looking down between points.
Finish cleanly at the top
When you reach the top of the pallet, pull the grip snug and lay it flat to see where it should end. Cut the excess at a shallow angle so the final edge follows the shape of the handle. A diagonal cut sits cleaner than a blunt straight cut and reduces the chance of a raised seam under your overgrip.
Peel the remaining adhesive backing, press the final section into place, and apply the finishing tape with a slight stretch. Start the tape just below the top edge, wrap it around two or three times, and press it down firmly. If you use an overgrip, install it only after the replacement grip is fully secured.
Choose Thickness for Your Style of Play
A new replacement grip can change handle size more than many players expect. A thin leather grip may make the handle feel smaller and more responsive. A thick, cushioned synthetic grip can add enough circumference to change how freely your wrist moves through serves and topspin forehands.
There is no universal best setup. Players who want more direct feedback, sharper feel on volleys, and clear bevel definition often prefer a thinner base grip with one overgrip. Players managing hand fatigue or looking for more impact comfort may benefit from a cushioned replacement grip, provided the handle does not become too large.
Use your hand as the final test. In a comfortable forehand grip, the fingertips should come close to the base of your palm without digging in or leaving a large gap. If your hand feels cramped, a thicker replacement grip or an extra overgrip may help. If you struggle to generate racquet-head speed or change grips quickly, excess thickness may be part of the problem.
Common Mistakes That Cost You Feel and Control
The most common error is wrapping without enough overlap, leaving exposed gaps that create ridges. The opposite problem is excessive overlap, which makes the handle bulky near the top and hides the bevels. Keep the spacing uniform rather than chasing a specific number of turns.
Another mistake is placing the wrap in the wrong direction. A grip can look clean on day one but start separating as your hand works against the exposed seam. Check orientation before you remove the adhesive backing.
Finally, do not ignore moisture. Even a premium replacement grip will become slick if it is saturated with sweat and never covered with an absorbent overgrip. For hot, humid conditions, use the replacement grip for structure and cushioning, then choose an overgrip that matches how much moisture you produce.
When to Replace Your Base Grip
Replacement grips last longer than overgrips, but they are not permanent. Replace yours when it feels compressed, slippery, torn, or noticeably uneven. Competitive players may need a new base grip several times per year, especially if they play often in heat or use a very tacky overgrip that pulls at the surface during changes.
At Profilex, we see the best equipment choices as performance decisions, not cosmetic ones. Your handle is the only point of contact between your body and the racquet. Wrap it with care, choose thickness with purpose, and every shot starts with a more confident connection.